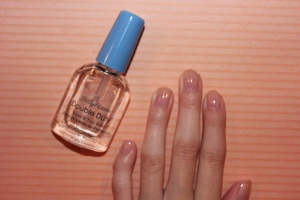
First, apply a base coat. I used Sally Hansen’s “Double Duty Base and Top Coat”.
Then, apply a black base color. I used Sinful Colors “Black on Black”.
Next, using an orange color, paint some pumpkins on the bottom portion of the nail. I used Apple Barrel’s “Pumpkin Orange” acrylic paint and a liner brush. To create the pumpkins I made an oval shape with a small line coming out of the top for the stems.
Then, outline the pumpkin shape (except for the stem). I used the same liner brush and I mixed the same orange color and Apple Barrel’s “Yellow” acrylic paint.
Next, create a tree branch at the top of the nail. I did this using the same liner brush and Delta Ceramcoat’s “Autumn Brown” acrylic paint. To do this I painted one longer squiggly line coming out from one side of the nail and then a few smaller squiggly lines coming from the sides of it.
Then, I mixed Craft Smart’s “Crisp Green” and “Light Green” acrylic paint together. I painted some grass in between the pumpkins just by painting some small lines and some leaves coming off the branches simply by slanting my brush and pressing it down where I wanted the leaf.
Next, to add some detail, I went added another color in the center of the leafs and a few more lines in the grass. I used the same liner brush and mixed Craft Smart’s “Light Green” and Apple Barrel’s “Yellow” acrylic paint together.
Finally, add a top coat. I used OPI’s “Matte Top Coat”.
Your fall pumpkin manicure is finished!


Leave a comment