First, apply a base coat. I used Sally Hansen’s “Double Duty Base and Top Coat”.
Next, apply an orange nail polish as a base color. I applied two coats of Finger Paints “Tangerine Tint”.
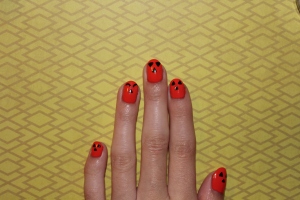
Then, in the center of the nail, create a small black triangle as the nose for the Jack-O-Lanterns. I used Apple Barrel’s “Black” acrylic paint and a liner brush.
Next, towards the top of the nail, paint the eyes. I painted some triangles (right side up for happy, upside down for angry) and some curved lines for a smiling pumpkin. I used the same materials to do this.
Then, for the hard part, the mouths. For the smiling mouth, I found it easier to paint the two curved lines, fill it in with black and then add the orange squares using the same color as your background. For the squiggly mouth, I painted two triangles on both side, connected them with zig zag lines and then filled it in.
Finally, apply a top coat. I used Sally Hansen’s “Advanced Hard as Nails Strengthening Top Coat”.
Your Jack-O-Lantern nails are finished!


Leave a comment